If you’re running ads with Google, Facebook, Instagram, or any source, you can use Zapier to get the leads into the AXLE CRM. Note: The Zapier integration is only supported for approved marketing partners.
Sign Up for a Zapier Account
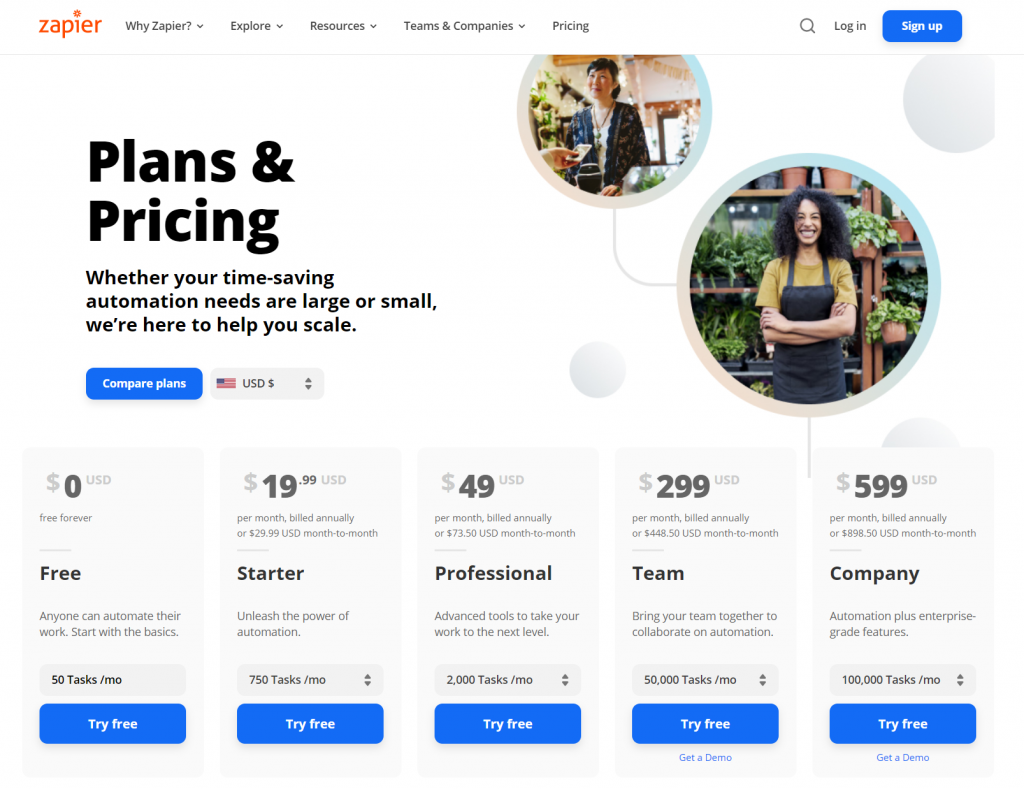
The first step is to get a Zapier account. You will need at least the $19.99/month Starter Account which allows 750 leads a month to be ‘zapped’ into AXLE. The ‘Free’ account won’t work because, to Zap, it requires the paid account ‘Webhooks by Zapier’ feature.
Create a New Zap
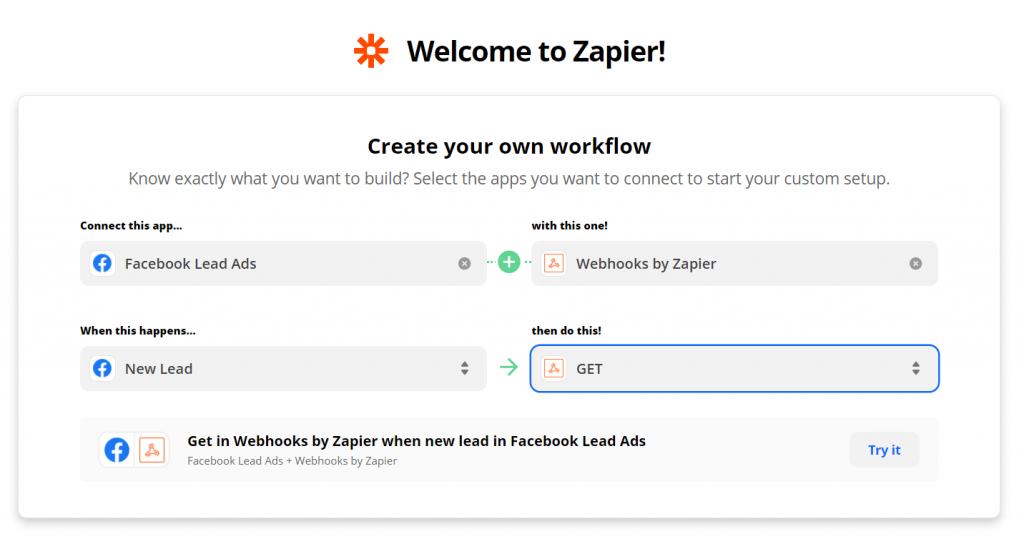
Once you’re logged in, click ‘Create Zap’. From there, when it asks you to use a template or create your own workflow, select ‘create your own workflow.’
Please note, we will create a Zap for each campaign. So, if you have multiple campaigns, you can set up one zap and clone it.
This article will proceed as if you are setting up a Zap from a Facebook Lead Ad to the CRM. The settings below are what you start with.
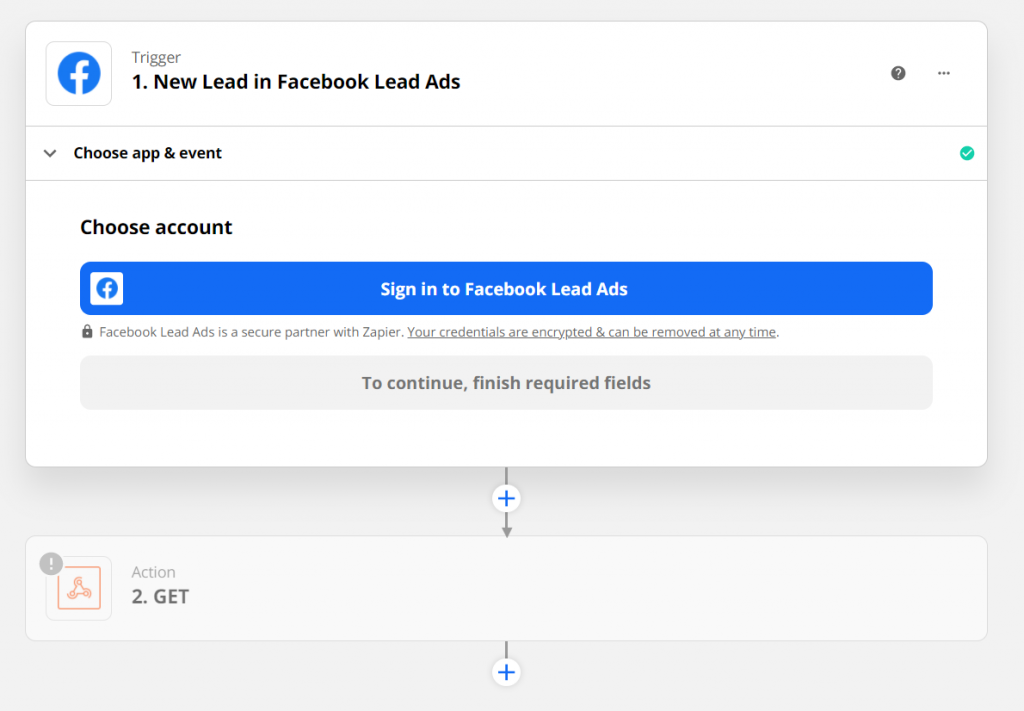
Pair Your Ad Account / Set Up Trigger
You will need to sign in to your Facebook account and link it with Zapier to continue.
When Zapping from Facebook, you want to make sure all of your ads are set to collect first names and last names separately. Check this before pairing Zapier.
When pairing, you have to choose the account, the page the ad is placed on, and the specific campaign/form you are collecting leads with. Once you’ve paired your account and selected the specific campaign for the lead collection, you’ll proceed to the second step which is the ‘Action’.
Setting the Action
The most complicated part of setting up Zapier, ‘Action’ is where you push the lead to the AXLE CRM. This will happen automatically every time a lead comes in once this setting is activated.
If you follow the instructions below carefully and make sure the screen is set up the same way as the screenshot below, you’ll be in good shape.

A. The URL. This should be https://webhook.axl3.io/new-lead/
B. The Query String Params. This is designed to break out each information piece that is sent to the CRM as well as the information that identifies your AXLE account.
- firstName
- lastName
- phone
- clientID (This is your AXLE client ID. You will get this from your contact at AXLE.)
- locationID (This is your AXLE locationID. You will get this from your contact at AXLE.)
- key (This is your ‘secret code’ that allows only you to sync to your account. Your contact at AXLE will provide this to you.)
- label (This is a keyword to describe the campaign so you can group all the leads together. It can be as general as ‘lead’ or it could be something to describe the ad like ‘freeclass’
- source (This should be one word that says where the lead is coming from. i.e. just ‘facebook’ or ‘adwords’ is sufficient.
Leave everything else as it is in default. If you changed any of the other fields, fix the settings by comparing them to the screenshot above.
Test the Zap
You can now press ‘Continue’ and test the zap. If successful, you will get a ‘code: 200’ response message.
Need help?
If you need help, you can send your Zapier login to support@youraxle.zendesk.com along with a campaign list and we can troubleshoot.